Tuesday, December 30, 2008
My Latest Creation- January Crop Project
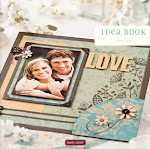
Woohooo... I just finished my Brugge, Belguim Acrylix Album. I just love it.
This is the group project that I will be teaching at the Snappy Scrappy Flamingo 3 day crop in January! It is such a fun project, that everyone will love creating. The paper is beautiful and can be used for many themes. I chose to do photos from my Belguim trip because of the colors.
If you would like details on the crop or if you would like to register, please visit my website.
I still have openings so hurry and register today!
Crop Info Here
Thanks for looking,
Tina
One heck of a mess!

I have one heck of a mess in my stamp room. I have been creating all week. WOOHOOO! Not only have I been creating, I never cleaned up after wrapping Christmas gifts. Oh good golly! If you guys could see my room!!!
I always get comments on how organized I am when I am teaching classes in The Stamp Pad. No one ever sees behind the scenes. I thought I would share a few photos. Don't worry, I am cleaning today! Tomorrow the room will be back to normal. Enjoy the mess!
A little frazzled,
Tina

Monday, December 29, 2008
Key To My Heart Swap

Designed by Tina Sutton
I participated in a card swap for Close To My Hearts December/January constant campaign- Key To My Heart. I wanted to share some of the awesome artwork I received from the swap! This was a card exchange so all of the artwork shown are cards. I just love this stamp set and papers. The colors are beautiful! Keep in mind, the photos do not do the artwork justice. Thanks to the fabulous artists for sharing their amazing talents!

Designed by Chris Hill

Designed by Michelle Nist

Designed by Beth Naumann

Designed by Barb Kelm
Hope you enjoyed the artwork!
Creatively yours,
Tina
If you would like more details on this special, click here!
Sunday, December 28, 2008
Awesome Holiday Gift

I got a happy in the mail yesterday. It was from my dear friend Chris Szczechowski. She made me this AWESOME cookie tray photo/memo holder. HOW CUTE IS THIS! I screamed when I opened it! She used one of my favorite paper packets- Perfect Day to create the background. The photo is of my team members on formal night on the Mediterranean Cruise! And... to finish the project, she added a Brighton Heart Magnet. PERFECT! Thank you Chris... I LOVE IT! Handmade gifts are the best.
Happy girl with a touched heart,
Tina
Saturday, December 27, 2008
A special visitor

I woke up this morning and found a special visitor on our doorstep. Here is the story behind him...
On Christmas Eve's eve, we went to a dirty santa Party at our friends house... Lynn and John. A dirty santa party is where you pick a gift, open it and then the next person can either steal your gift or pick another gift. I was nice and didn't steal a gift and opened this "ADORABLE - (wink, wink)" caroler. Can you believe that some of our friends actually stole this from me!!! I was sooo upset. I ended up with a Starbucks gift certificate. DARN!!! (wink wink).
Anyway.... when I opened our front door this morning, I was surprised to find my special friend on my doorstep. Now I can enjoy Baby Dixie until next Christmas. YAHHOOO! We are so excited. I just hope he likes it here and doesn't run away!!!!!


Friday, December 26, 2008
Christmas Cards from Friends
I meant to post these cards before the holidays but time got away from me! I thought these cards were beautiful... all made by wonderful friends. I wanted to share them on my blog. Feel free to stamp-lift. It is NEVER to early to start on next year's cards!!!
Tina
Tina
Thursday, December 25, 2008
Merry Christmas

I would love to extend a Very Merry Christmas to all my blogging friends. Happy Holidays!
Tina
Holiday Traditions

Every holiday season, Faith, my dear friends daughter and I decorate a Gingerbread House. This year we were so busy that we did not find time to decorate it until yesterday, on Christmas Eve! We had such a good time, the photos tell the story. I just had to post... it is too adorable not to share! Enjoy!
Tina


Thursday, December 18, 2008
Yippee... I earned second place in the CTMH artwork contest

I have been feeling yucky, yucky, yucky since the cookie exchange. (one too many cookies) I was surfing the Internet a few minutes ago and discovered I earned second place in the CTMH artwork contest for November. YIPPEE SKIPPEE! Not only am I published I earned $50 in CTMH products. OH HAPPY DAY!
I have the directions for this book on the blog. If you would like a copy, look under PROJECTS under blog labels.
Thanks for letting me share!
Tina
Sneek Peek

I created this card using one of our new spring paper packet- Emporium! I just love this paper. It is almost too pretty to cut! Enjoy the card.
Tina
Team Holiday Party
I hosted a team cookie exchange on Tuesday night. We had SO much fun and I ate so many cookies that I was sick. (that is why I wasn't blogging yesterday). We made 3 dozen cookies, ate 1 dozen and took 2 dozen home. Fun, Fun, Fun! Not only can my team scrapbook, they can BAKE! The cookies were GREAT!
After the cookie exchange we did an ornament exchange. Then we created our team holiday recipe albums. I thought I would share my album. It turned out so cute- so photos don't do it justice. We actually had 28 people participate. We only swapped 12 recipes, so I don't have all the photos and recipes scrapbooked. The book actually stands up- like the cover and first page shows. I photographed the recipes flat so that you can see how I put a photo of the baker on the top and the recipe on the bottom. I am so darn excited over this book!
This recipe album makes a great holiday gift and is perfect for cookie exchange parties!
My camera battery pooped out half way through the party so I only have a few photos from the party to share. I am hoping that our team photographer- Rae Bangs will share some of her awesome photos.
This album was inspired by my talented second upline Bren Yule! She made a family recipe book that got me so excited that I had to make one too! Thank you Bren!
Enjoy the slideshow!
Tina
Here are a few recipes to enjoy:
Oreo Snow Balls
By Leah Marlow
Ingredients:
1 package Oreo cookies
1 (8 0z.) package cream cheese (softened)
1 package white chocolate chips
1 tablespoon shortening
Crush the entire package of Oreos (use food processor or blender).
Mix the softened cream cheese into the cookie mixture.
Form into 1 inch balls and put them in the freezer to harden a bit.
Melt the white chocolate and shortening in microwave. Remove
balls from freezer and place on wax paper. Drizzle the white chocolate
over balls or dip them into the white chocolate. Place snow balls on wax
paper and refrigerate. Makes approximately 3 dozen.
ENJOY!
Cherry Chip Cookies
(from Meredith Painter’s great grandmother, Hazel Likely)
2 sticks softened butter 1/8 tsp. salt 4 oz. cherry chips
½ cup sugar 1 egg yolk ¾ cup crushed cornflakes
2 tsp. almond extract ½ cup chopped nuts2 ¼ cups flour
Cream together butter, sugar, egg and extract, add dry ingredients then stir
in chips, cornflake crumbs and nuts. Very thick dough…can add water Tbsp
at a time as needed. Roll into 1” balls, place on ungreased cookie sheet and press
criss-cross with fork. Bake at 375 degrees for 12-15 minutes. Cherry Chips can
be ordered from Gurley Foods (320)325-0600.
Tina's Note: These cookies were great. They are worth the hassle of ordering the Cherry Chips. I ordered a box of 12 packages. I am going to impress my Mother - in- law with these. My MIL is a wonderful baker!
Glazed Crackers Cookies
From the Kitchen of…Tina Sutton…Navarre, FL
1/2 Cup Margarine
11/2 Cup Unsalted Butter
½ Cup Sugar
1 tsp. Vanilla
1 cup chopped pecans
2 packages chopped pecans
Preheat over to 350 degrees. Combine margarine, butter and sugar. Boil 3 minutes. Add vanilla and pecans. Arrange crackers on two cookies sheets and spoon butter mixture over crackers. Bake 8 minutes. Remove from oven and allow to cool briefly. Remove crackers from cookie sheets with spatula.
Tuesday, December 16, 2008
Christmas Bear

That is my second encounter with Mr. Black Bear. Last time, I took a photo of him, this time I ran away! When instincts take over, I do exactly what the Florida Black Bear website says not to do. Oh well... it makes a good story!
Happy December 16th.
Tina
Gift Card Holders or Money Holders!
I have been making Card holders like crazy! I thought I would share what I have been making. My dear friend and downline shared this pattern with me! Directions are below!
Enjoy!
Tina

Front of Card

Inside of card
Card or Money Card
Directions by: Tina Sutton

Directions:
Inside of Card:
1. Cut a 4” x 12” strip of cardstock for base. Colonial White was used in sample.
2. Score at 4” and 8”.
3. On the middle square, score at a diagonal as photo shows!
4. Fold as shown!

5. Use adhesive to secure right edge and bottom edge.
6. Cut a piece of CTMH background and Texture Paper to 3 ¾” x 3 ¾”. Cut at a diagonal. Use opposite coordinating sides to diagonal pocket.

Front of Card:
1. Cut a piece of cardstock 3 7/8” x 3 7/8”. New England Ivy was used in sample. Adhere it to the front of the card.
2. Cut a piece of cardstock 3 ½” x 3 ½”. Cranberry was used in Sample.
3. Cut a piece of cardstock 3 ¼" x 3 ¼”. Colonial White was used in Sample. Stamp design on front of card. (C1328-Festive Frills was used in sample).
4. Embellish card and insert money or gift card. Send to a friend. FUN, FUN, FUN!
Enjoy!
Tina

Front of Card

Inside of card
Card or Money Card
Directions by: Tina Sutton
Pattern shared by Barb Carrico

Directions:
Inside of Card:
1. Cut a 4” x 12” strip of cardstock for base. Colonial White was used in sample.
2. Score at 4” and 8”.
3. On the middle square, score at a diagonal as photo shows!
4. Fold as shown!

5. Use adhesive to secure right edge and bottom edge.
6. Cut a piece of CTMH background and Texture Paper to 3 ¾” x 3 ¾”. Cut at a diagonal. Use opposite coordinating sides to diagonal pocket.

Front of Card:
1. Cut a piece of cardstock 3 7/8” x 3 7/8”. New England Ivy was used in sample. Adhere it to the front of the card.
2. Cut a piece of cardstock 3 ½” x 3 ½”. Cranberry was used in Sample.
3. Cut a piece of cardstock 3 ¼" x 3 ¼”. Colonial White was used in Sample. Stamp design on front of card. (C1328-Festive Frills was used in sample).
4. Embellish card and insert money or gift card. Send to a friend. FUN, FUN, FUN!
Monday, December 15, 2008
Your age by eating out!
I usually don't do these puzzles, but my cousin Joe sent this to me, and I couldn't resist. This is MIND BLOWING! I did the math and as promised... it weirded me out... but in a fun way!!! Give it a try!
Your Age by Diner and Reastaurant Math-
This takes less than a minute. Work it out as your read. Don't read the bottom until you've worked it out. Trust me... it's fun!
1. Pick the number of times a week that you would like to go out to eat. (more than once but less than 10).
2 Multiply this number by 2.
3. Add 5.
4. Multiply by 50.
5. If you have already had your birthday this year add 1758. If you haven't, add 1757.
6. Subtract the four digit year that you were born- You should have a 3 digit number.
7. The first digit of this number was your original number (how many times you like to eat out).
8. The next number is your AGE... OH YES IT IS!
Wow... think about it. Whew... I am off to bed at 8 p.m! Too much for the old brain to handle!
Tina
After the Christmas Tree Crash

Ok, several hours later... the house is back to normal. I ran to Walrmart this morning and got another Christmas tree. It's all decorated with all my Kitchen Christmas ornaments. Hopefully this one won't crash tonight!
We have had a busy day around here getting ready for the CTMH team cookie exchange today! I baked cookies with a little help from Faith and Daisy! Ho, ho, ho!
Enjoying the season...
Tina


Things that go bump in the night!
Visual this... it is 1:00 a.m. Kent, myself and the dogs are sound asleep. We hear this LOUD crash! The dogs go insane, barking, howling, etc. I jump out of bed and this is what I find!


My Kitchen Christmas Tree fell off the kitchen bar. Some of my favorite ornaments, including my Starbucks coffee ornament, had broken. UGHHH! The leg on the tree broke causing the entire thing to crash. I was devastated and poor Daisy (who is somewhat of a coward) was a mess. She wouldn't settle down. So, it is 2 a.m. and I am brushing Daisy, (she loves to be brushed) to get her to go back to sleep. I guess we are in for another long day. I didn't get my much needed 8 hours last night!
Off to Target to buy a new tree this morning!
Tina
Off to Target to buy a new tree this morning!
Tina
Sunday, December 14, 2008
Combat Zone

Tina
Saturday, December 13, 2008
Scrapbook Holiday Party... FUN, FUN, FUN!
I had a holiday party for My Scrapbook Club Members last Thursday night. I am so thankful to my scrapbook club members. We had a holiday celebration on Thursday night and it was fun, fun, fun! I love to cook and I had a Mexcian Holiday Dinner. We ate Mexican Lasagna, Spanish Rice, Ceasar Salad, and Chips and Salsa. For desert we had Cheesecake and White Chocolate Cranberry Cookies. Many requested the recipes so I am going to post them on the blog for all to enjoy. Have fun viewing the slideshow and enjoy the recipes.
I have been making the Mexican Lasagna for 20 years. It is a Weight Watchers Recipe. Of course, I add more cheese than called for ... but hey... it's the holidays. Ho, Ho, Ho!
Mexican Lasagna
12 Cooked Lasagna Noodles
1 1/2 pounds of ground turkey
8 oz. of mild salsa
1 package of taco seasoning
8 ounces of tomato sauce
8 oz. ricotta cheese
4 ounce can of green chilies chopped
1 bag of Mont. Jack Cheese
1 bag of cheddar cheese
Preheat over to 350 degrees. Brown turkey over medium heat. Add salsa, taco seasoning, green chilies and tomato sauce. Simmer. Cook lasagna noodles. Layer noodles, sauce, and all 3 cheese. Repeat 3 times. Bake for 45 minutes. YUM!
White Chocolate Dipped Oatmeal Cookies
1 cup butter
1 cup firmly packed light brown sugar
1/2 cup granulated sugar
1 large egg
1 tbsp. vanilla
2 cups flour
1/2 teaspoon baking powder
1 teaspoon baking soda
1/2 teaspoon salt
2 cups sweetened dried cherries
1 1/2 cups pecan pieces- toasted
1 1/4 cups uncooked quick cooking oats
1 bag white chocolate chips
1. Mix butter, sugars, egg and vanilla.
2. Combine flour and rest of ingredients. (except chocolate chips)
3. Drop by tablespoons 2" apart on lightly greased baking sheets.
4. Bake at 375 degrees for 9-11 minutes or until lightly browned. Cool completely.
5. Microwave white chocolate in medium sized microwave- safe bowl on high for 1 minute or until melted. Dip half of each cookie into melted chocolate, letting excess drop back into bowl. Place dipped cookies on wax paper and let stand until firm. Yield 3-4 dozen.
Happy Eating!
Thursday, December 11, 2008
Bag-a-Box... another great holiday idea!

Supplies Needed:
8 1/2" x 11" Cardstock
Circle Punch
Paper Trimmer with scoring blade
Scissors
Stamps
Inks
Ribbon
Liquid Glass
Friskars Scallop Punch
Stamps and Inks Used:
D1317 Feathery Flakes
B1313 Merry Pursuits
D1313 December Word Puzzle
Bubble Gum Cardstock
Bubble Gum Ink
Citrus Leaf Ink
Citrus Leaf Cardstock
Clover Meadow Cardstock
Sparkle colored with Sharpie
Markers for coloring Elf- Bubblegum, Citrus Leaf, Clover Meadow and parchment
Instructions:

1. Random stamp your cardstock with a background stamp. I used Feathery Flakes (D1317) with Bubble Gum Ink and Cardstock.

2. Position your cardstock horizontal. Score cardstock at 2", 5", 7" and 10"

3. Turn your cardstock and position your card vertical. Score at 2" and 7 ".

4. Hold cardstock horizontally with 2" section at top. Use scissors and cut off all but one 2" section on top. This is the flap closure for the box.
Make vertical cuts at the bottom to create 1 1/2" tall flaps. This will be the bottom of the box.
Cut off the left side top and bottom piece. This is the side of the box.

5. Use a scallop punch and punch along 2" flap to create a scalloped edge on box flap.

6. Fold on all scored lines.
Apply liquid glass to side tabs score line.
Fold small flaps towards center of box and large flaps over small flaps.
Apply pressure to box edges and hold until glued.

7. Line up front of box with back of box at top and pinch together. Release.

8. Punch two holes in flap. Pull down to close box and use a pencil to mark where holes in bag should be punched. Punch holes at markings.


9. Thread ribbon through holes at markings. Tie ribbon and decorate front of box.
Enjoy decorating and filling.
CUTE, CUTE, CUTE!
Wednesday, December 10, 2008
Christmas Card Classes Great Success

I finished teaching my Christmas Card Classes for the season! They were a big success. I taught over 100 students how to make Christmas Cards this year. OH HAPPY DAY! Many mailboxes will be filled with beautifully handstamped cards this year!
Last night I had my last class. I took a few photos and I was thrilled by the expressions on the ladies faces. I had to share.
Tomorrow is Scrapbook Class. WOOHOO! I just love my job.
!

Holiday Fun

Tuesday, December 9, 2008
A gift from CTMH
Yesterday was such a happy day. I took the day off and went Christmas shopping with two of my very dear friends. When I got home, I was surprised to find a beautiful gift from CTMH in my mailbox. I am so lucky to work for a company who sends hand stamped Christmas Cards and gifts to their Directors. It blows me away that this company cares so much. How lucky am I to have this job?
I hope you enjoy the photo of the artwork and the bracelet. The photo does NOT do the bracelet justice. It is BEAUTIFUL!


I hope you enjoy the photo of the artwork and the bracelet. The photo does NOT do the bracelet justice. It is BEAUTIFUL!


Sunday, December 7, 2008
Remembering Pearl Harbor
December 7, 1941...
The Japanese planned a surprise strike on Pearl Harbor. My StepDad was there!
In 1976, he organized a local chapter of Pearl Harbor Survivors. In 1976, there were 64 members. Today there are 12. I am so honored that I was able to attend a Pearl Harbor Remembrance Ceremony with him today at the Pensacola Naval Aviation Museum. Please enjoy the photos from the event!
He was also featured in The Pensacola News Journal this morning. He talks about the scrapbook that I helped him create with stories from all of the survivors. I thought I would share.
From the Pensacola News Journal
December 7, 2008
They survived the surprise attack on Pearl Harbor 67 years ago. And when they formed a local chapter of Pearl Harbor survivors in 1976, there were 64 of them. Today, there are 12.
They'll meet this morning for the Pearl Harbor Remembrance Day ceremony at the National Naval Aviation Museum.
They're the last living reminders of one of the most tragic and life-changing moments in United States history — the Japanese attack on Pearl Harbor which killed about 2,400 Americans and plunged the United States into World War II.
"We're losing our buddies," said John Rutledge, 89, president of the local chapter of the Pearl Harbor Survivors Association. "You become aware of the fact that there's not too many of us left."
This past year, three chapter members died, including John Cumming, who was chapter president. He was 88 years old.
"That was a big loss for us," said member Jay Carraway, 86, a founder of the chapter and its current treasurer. "He was a great leader and really instrumental in helping us get that memorial stone."
The Pearl Harbor Survivors Stone — a marker honoring all survivors of the attack — was dedicated at Barrancas National Cemetery last year.
Carraway said that it's important that, as survivors die, their stories are preserved for history's sake. That's why he's compiling a scrapbook filled with pictures and testimonies of area Pearl Harbor survivors. He hopes to give the book to the National Naval Aviation Museum when it's completed.
"It brought the country into war," Carraway said. "And it brought the country together for one common purpose — to win the war."
Sunday surprise
Carraway was a 19-year-old seaman aboard the USS Hulbert during the Pearl Harbor attack. He was in the forward crew compartment waiting for the mess cooks to bring breakfast down from the galley when the message rang through the ship: "Man your stations."
The young sailor and most of his buddies thought it was a drill.
"We just yelled 'Get our breakfast down here,' " Carraway said. "We don't drill on Sundays."
But it was no drill. A nearby explosion that rocked the ship proved it.
Carraway rushed topside, and for the next few hours he manned an anti-aircraft gun that targeted Japanese attack planes.
"They were flying so close," he said, "that you could see the pilots' faces."
Rutledge, 89, was a Navy musician assigned to the battleship USS California at Pearl Harbor. The night before, the ship band had competed in the Battle of Music, a musical competition between the California and other Pacific Fleet battleships.
Caught off guard
On the morning of the attack, Rutledge, with his drum at the ready, was preparing to play morning colors when a large swarm of airplanes approached. Rutledge thought the planes might be U.S. planes running training missions.
"A plane just broke through the clouds and dropped something," he said. "I just wondered what was going on. These kinds of things didn't happen on a Sunday."
Then the bombs started exploding all around. Soon after, the California was hit by two torpedoes, throwing most of the band members, including Rutledge, into the water.
Rutledge swam through oily water and debris to nearby Ford Island, where he was pulled ashore.
Later, he would help transport the wounded to hospitals.
"We lost a lot of people that day," Rutledge said. "And it's important that we don't forget them and what happened."
He'll be at today's ceremony.
"I wouldn't miss it for the world," he said. "And we all feel the same way. Everyone who was there and lived through it, we're buddies for life."
To all of the men and women who have served our country or are currently serving... Thank you and God Bless!
Tina
Saturday, December 6, 2008
Friday, December 5, 2008
I received my first hand stamped Christmas Card! Thank you Jean McNulty!

I received my first hand stamped holiday card! WOOOHOOO! Thank you to Jean McNulty, a superstar team member from Hawaii! Her card is beautiful and I just had to share! Enjoy her awesome artwork! Thank you Jean!
Love these layouts!

I finished my Workshop on the Go class that I am teaching next week. I am happy, happy, happy with the way the photos and the papers go together. I love the colors and I just had to share. Enjoy!
Tina


It's Starting to Feel a Lot Like Chistmas!!!


Subscribe to:
Comments (Atom)