Friday, October 23, 2009

Faith's Pumpkin


Sharing Faith's Halloween Pumpkin!

Stamped Candy Bar Wrapper for Halloween


I am making up a Halloween Pumpkin Basket for Faith, and I decided to add some hand stamped items to it.  Candy bar wrappers are such an easy and quick way to bring a smile to someone's face.  You simply cut the paper to fit, wrap with decorated Background and Texture paper, stamp it up and WOLA... A customized candy bar for any occasion.  In this sample I used Enchanted Background and Texture paper, Black Ink and my favorite stamp set this October... Beware.  Enjoy!

Tina

Scrap, Stamp and Chat Club- December


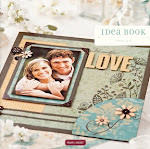
Since I am leaving for Paris on Thursday, I thought it was only appropriate that I scrapbooked photos from my day in Paris last year.  Here is a layout from Workshops on the Go, that I will be teaching in December.  I changed it up a little to make my photos work.  I love the way it turned out. 

6 days and counting!

Tina

Wednesday, October 21, 2009

Holiday Wreath made out of Jingle Paper!


It is Creative Day at my house today.  I made this cute holiday wreath from the instructions that my friend Julie shared with me!  When I saw this project, I immediately thought of our Jingle Paper.  I used a Martha Stewart punch for the leaves, and the berries are CTMH connections gift - pearls.  Here is a fun tip- take a permanant sharpie marker and color the pearls any color that you like.  It is a fun way to take them from white to BRIGHT!  If you would like to make this project the tutorial  can be found at www.activitytv.com.  Have fun creating.  Jingle, Jingle, Jingle!

Tina

Trick or Treat


I am working on Halloween Treats for a costume party that we are attending this weekend.  I used our new stamp set Beware (D1381) and background and texture paper from Tinkerin!  The colors and stamps set make you want to smile and yell... Trick or Treat! Off to make 50 more.  Fun, fun, fun!

Halloween Hugs,

Tina

Tuesday, October 20, 2009

Around The Holidays Circle Kit and Workshop (December 3)


I am so excited to announce my newest workshop by mail kit and local workshop-Around the Holidays!   Circle Cards are all the rage and no one makes them better than CTMH!  This workshop will teach you how to maximize CTMH's Holiday Around The Holidays Card Kit!  In this class you will make a holiday garland for your fireplace as well as 5 cards AND a decorative tin to store them.  Make these beautiful items for yourself or give them as a gift!  This workshop promises to be Fun, Fun, FUN!

The class will take place at Marcus Pointe Baptist Church in Pensacola on Thursday, December 3rd at 6:30 p.m!  The cost is $25.00 and includes all your supplies!  Please RSVP as seating is limited!  Can't make the workshop- no problem, order your kit by mail! Add $5.00 extra for shipping.  Email me to order your kit or to reserve your spot in this amazing class!


Workshop Kit Includes:
Circle cards, envelopes, ribbon and 3 d foam squares, Circle Tin, Full Instructions
This is a holiday workshop so bring some Christmas Cookies or Cocoa to share!


Circle cards inspired by Lisa Stenz

Sunday, October 18, 2009

Has it been 30 years? EHS Reunion Meeting


Where has the last 30 years gone?  Today I went to an EHS Class of 1980 Reunion Meeting to  help plan  (gulp... I can't believe I am putting this in writing)  our 30th high school reunion.  It was so much fun to see old classmates, most whom I have not seen in 30 years!  We all look a tad bit different- I think we should have worn name tags!!!!  Everyone looks great and we are all still a lot of fun!!!

The tentative date for the reunion is the weekend of June 18, 2110.  More details will follow.  If you graduated from Escambia High School, Class 0f 1980, be sure to join the Facebook Group- Escambia High 1980.  Details will be posted on this group as soon as they become available.

The reunion is going to be FUN, FUN, FUN!  I can hardly wait!

Tina

Saturday, October 17, 2009

October Stamp Of The Month Cards


I got a little crazy on Thursday night, as I realized that I had not used the October Stamp Of The Month- Holiday Warmth.  I love the stamp set but just have not had time to play. So, at midnight I created a few samples.  I hope you like them.  I used Jingle Paper (I love that set- can you tell?) and our Creative Basics paper packs.  Inks are markers are:  Twilight, Baby Pink, and Tulip! 

If you would like more information or artwork made with October's Stamp Of The Month, click here. It is not too early to think Christmas!

Tina

Thursday, October 15, 2009

Make a Bag out of an Envelope! FUN, FUN, FUN!


How cute are these bags for October?  I am thinking they would make great treats to give to school friends, co-workers or neighbors.  The best thing about these bags are they are ridiculously easy to make and inexpensive at the same time!  All you need is an envelope (any size will work), some background and texture paper,  acrylix stamps and ink!  Papercrafting can't get much easier than that!

Here are the instructions:

1.  Seal the envelope.
2.  Cut it.  You can cut it in half to make two little bags or cut it near one end to make it a little larger.


3.  Fold each side in, 1/2 inch (hot dog fold).  CREASE both sides WELL!  (heavy folding is crucial)


4.  Fold the bottom of envelope up 1/2 inch (hamburger fold).  Crease well. 

5.  Unfold all creases, and stick your hand inside the opening.  With your free hand press down the the bottom of the bag to look like the photo below.  You are reversing the bolds. 

 
6.   Fold the triangular tips to the inside.  Use a glue dot to secure!

7.  Decorate bags and add a handle.  FUN, FUN, FUN!

Recipe for bag above:
Colonial White Envelope
Enchanted Paper Pack (level 2)
C1324 Spooky Smiles Stamp Set
Autumn Terracotta, Olive and Black Ink
Brads to attach handle to envelope bag!

Wednesday, October 14, 2009

Princess Card


Just quickly sharing a card I made today.  I used Jingle Paper and Happy Endings Stamp Set!  Enjoy!

Tina

Tuesday, October 13, 2009

Glitter Mist Christmas Card


I am having so much fun with Glitter Mist.  You can't really see the detail of the Glitter Mist in this photo but in person, it SHIMMERS!  It takes an ordinary snowflake and makes it extraordinary.  Glitter Mist is fast becoming one of my favorite techniques.

Recipe for making your own Glitter Mist:

1.  Find an empty spray bottle.
2.  Mix Pearl Paint, Rubbing Alcohol, re-inker of choice (I used Juniper for this card), and prisma glitter in spray bottle.   I put equal parts of alcohol and paint,  a few drops or re-inker and lots of prisma glitter.
3.  Spray background of card, dimensional element, or accent  (in this card I sprayed the snowflake dimensional element) with glitter mist
4.  Let it dry for about 15 minutes and finish card.

Try this technique... you will love it!

Recipe for Card:

Jingle Level 2 Paper
White Daisy Ric Rac
Twilight Ink
Peace On Earth Stamp Set
Glitter Mist (see recipe above)
Snowflake Dimensional Elements

Have fun creating with Glitter Mist!  I would love to see your Glitter Mist Creations!

Tina

Monday, October 12, 2009

Stamp, Chat and Scrap Club so much fun!


Last week was  Scrap, Chat and Stamp club!  We had so much fun celebrating Halloweeen.  I made cupcakes, Maryann brought carrot cake, Debra Kay brought candy and Jennifer made treat bags.  YUM!  We have so much fun in club and we are always looking for fun people to join.  If you live in the Florida Panhandle and want to join a crazy bunch of papercraft artists, please contact me.  We would love to have youjoin our group.

I hope you enjoy the photos.  Did I scare you?  LOL!

Tina

Thank You Card from Jen Cox-HAPPY MAIL


My dear friend Jen Cox, and granchild in my downline (my fourth downline- for those of you non- CTMH demonstrators) sent me this beautiful Thank You card.  Isn't it gorgeous?  I love the colors and the design.  The gold embossing used for the sentiment, just made this card POP!  Thank you Jen... you are very talented.  You made my happy, happy, happy, as I love getting happy mail! 

Recipe: 
Paper- Free Spirit Level 2 Paper Packet
Autumn Terracotta Ink
Sunflower Cardstock
Embossing Powder- Gold
Stamp Set- D1363 Thank you (THIS IS A MUST HAVE!)

Thursday, October 8, 2009

Hand Stamped Halloween Nugget Box


It is that time of the year again, where I start making nugget boxes to give away as goodies.  They are fun, simple and inexpensive to make.  WARNING- they can be hazardous to your weight, if you eat the nuggets rather than wrap them!  LOL!

Here is the recipe:
Clear Tin
Enchanted Level 2 Paper Packet
Archival Ink
Merry Monsters Stamp Set
Autumn Harvest Marker Set
Grey Flannel Marker
Watercolor Brush
Black Ribbon
Liquid Glass to adhere eyes and to make the monster look slimy!

Thanks for looking.  I hope you enjoy it!

Tina

Wednesday, October 7, 2009

Embossed Halloween Card


I made this card to do at Stamp, Scrap and Chat club tonight.  It is a simple yet cute project.  Just in case you want to make one at home, here is the receipe:

Dimension- White Card- 4 x 4
Hydrangea (Purple Paper) 3 3/4 x 3 3/4
Sunflower Circle- 2 1/2 " Circle

Stamp Set: S1319 Creepy Cobwebs
Accessories:
Black Embossing Powder
Versamark Pad
Heat Gun
Black Ribbon

Grace Workshop Slide Show- Featuring Cards and Scrapbook Pages

Dates and details of this class are listed in the post below!

Grace Workshop On The Go- November 4th and 5th- Create Scrapbook Pages or Cards... YOUR choice!


I am so excited about this workshop! The pages and cards are BEAUTIFUL. The photos do not do it justice. In person, these layouts scream with beauty. Here are the details:

Stamp Scap and Chat Local Club- Featuring Grace

Nov 04, 2009; 6:30 PM to 9:00 PM or November 5th at 2:30 P.M or 6:30 P.M.
You must email me to register and hold your spot. Seating is LIMITED!


Basic kit is $29.95 plus shipping and tax.

Make 4 layouts! or Make 12 cards! or Make 2 Layouts and 6 cards!

The choice it yours....

Better Yet... add a few sheets of cardstock and make all the layouts and cards!
Bring your basic supplies- paper trimmer, scissors, adhesive, glue dots, etc.
As always, I will adhesive that you can purchase at class!

Want to add bling to your page? Email me for a shopping list, and order all the extras to make your pages go from ordinary to extraordinary! Click on the link below to view the shopping list!

This workshop is available by Mail. Email me for details.

For those who are attending locally, I will have my coordinating stamp sets out and available for you to use so that you can customize your pages or cards using different stamp sets. You can make the pages "YOUR OWN!"

Hope to see you in class!

See pos

Monday, October 5, 2009

Close To My Heart's Regional Celebration in Minneapolis

I am home from an amazing trip to Minneapolis. Close To My Heart's Regional Celebration was AMAZING! I had planned to keep everyone updated when I was there, but I was too darn busy running around. I think I averaged about 3 hours of sleep a night. They say that a picture is worth a thousand word words, so I am going to spare you the thousand words and let the photos tell the story. ENJOY!

Tina

Tuesday, September 29, 2009

Leaving on a JET PLANE!

I am off to Minneapolis for Close To My Heart's Regional Celebration. I am so excited. Today I am airborne, tomorrow it is Mall of America (so excited) and Thursday the Regional Celebration begins. I am so looking forward to seeing my team members and Close To My Heart Sisters!

Tina

Monday, September 28, 2009

New Christmas Card Buffet Added


I have had a lot of great feedback on my Christmas Card Class... so I am offering another date. The class will be Monday, October 19th, at 6:30 p.m., my stamp pad in Navarre, Florida. Seating is limited so sign up ASAP! Hope to see you in class!

To Sign Up: Call Tina at 850-939-4630 or email Tina@missgingerdots.com.


What To Bring: paper trimmer, scissors, adhesive, glue dots, treat to share with others. (as always, I will have adhesive for sale at the workshop!


Details:


Basic Kit
X5808: Creative Basics Jingle ($7.95) (You will have some of this paper left over for future projects)
1385: 3-12" x 12" sheets of White Daisy Cardstock ($1.20)
X5752: 3-12" x 12" sheets Juniper Cardstock ($1.20
BULK159: 10 - 8.5" x 11" sheets White Daisy Cardstock (cut into 20 card bases - 1.70)
Z1225: 1 - Flurries Dimensional Elements (4.95)
Z134 Prisma Glitter ($4.25)
1- Texture Tool Sponge- $2.48
1 - Instructions and Cutting Guide with photos

Total Cost with Shipping and Tax: $26

Better Kit= Basic Kit + the following products
Z2365: 1 – Juniper Marker (2.95)
Z2366: 1 – Tulip Marker (2.95)
Z2367: 1- Crème Brulee Marker ($2.95)
Z2105: 1 - Black Stamp Pad (5.25)
Z2166: 1 - Tulip Stamp Pad (5.25)
Z2165: 1 - Juniper Stamp Pad (5.25)

Total Cost with Shipping and Tax: $50.60

Add Another 20 Cards to whatever kit you choose:
1385: 3 - 12" x 12" sheets White Daisy Cardstock ($1.20)
X5752: 3 - 12" x 12" sheets Juniper Cardstock ($1.20)
BULK159: 10 - 8.5" x 11" sheets White Daisy Cardstock (cut into 20 card bases - 1.70)
Z1225: 1 - Flurries Dimensional Elements (4.95)

Total Cost to Add to whatever package you choose: $8.65

Add on Options:
Z1027: Envelope Flats (package of 10): $2.95 per package
D1374: Ms. Holiday Cheer Stamp Set (22.95)
D1366: Holiday Trinkets Stamp Set (22.95)
C1371: Holiday Jingle Stamp Set (18.95)
C1378: Heartfelt Christmas stamp Set ($18.95)


What to bring: Paper Trimmer, Scissors, Adhesive, Glue Dots (as always I will have adhesive available for purchase at the workshop)


Workshop by Mail Kit Available. Will ship kit in October! Add $7.95 for shipping!
Keep in mind, that images are not stamped. You will need stamps to do the cards.